Bright garden crafts plastic bottles- a simple and affordable way to decorate your favorite area. The original sculpture of a stork made of durable material will update the familiar landscape and create a joyful mood. A do-it-yourself bird figure will make the garden unique and become a family symbol of kindness and happiness.
To make such a craft, you need to stock up on free time and be creative.
My patio is adorned with a stork figurine based on a 5 liter plastic bottle covered with polyurethane foam and painted with acrylic façade dyes.
Here is such a wonderful stork obtained from a plastic bottle and polyurethane foam
Creating your own bird design, you can assemble it entirely from plastic containers, fastening them with glue or staples. And you can make the sculpture more expressive by adding plastic construction wood details.
The frame of this bird is wooden, covered with plumage from plastic bottles.
Or make individual elements of foam.
You can create such an exotic collection using ordinary plastic bottles and a piece of foam.
For our crafts of impressive size, you will need:
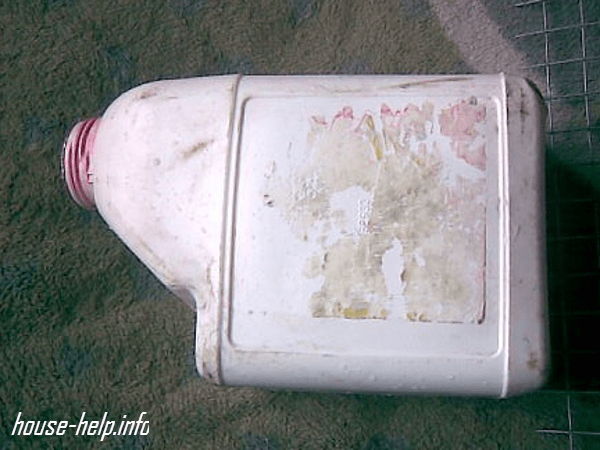
The 5 l canister forms the basis of the torso
Plastic container dark color needed for feathers, legs and beak
A bird's head is made from a piece of foam
A long bird's neck is made from a corrugated tube
With the help of wire, the wings are firmly attached to the model of the body.
Glue universal quickly glues plastic and other materials
Having acquired tools and materials, they first prepare all the details of the bird, then assemble it.
A head with a beak is cut out of the foam plastic with a sharp knife.
A bird's head is cut out of a piece of foam
Then grind the rough surface with sandpaper. You can cover the workpiece with white facade paint.
The workpiece is sanded with sandpaper to make the surface smooth.
To strengthen the beak, 2 triangular plates are used, which are made from a dark bottle of 0.5 liters. Having cut off the neck and bottom, cut along the resulting cylinder and cut out triangles. The plates are bent in half and attached to the beak with self-tapping screws.
The beak is made out of plastic, attaching it to self-tapping screws
They are made from the top of brown bottles of 0.5 liters. Containers with a cut off bottom are cut to the neck lengthwise into 4 parts, sharpened at the ends and bent outward.
Paws with fingers are cut out of dark bottles
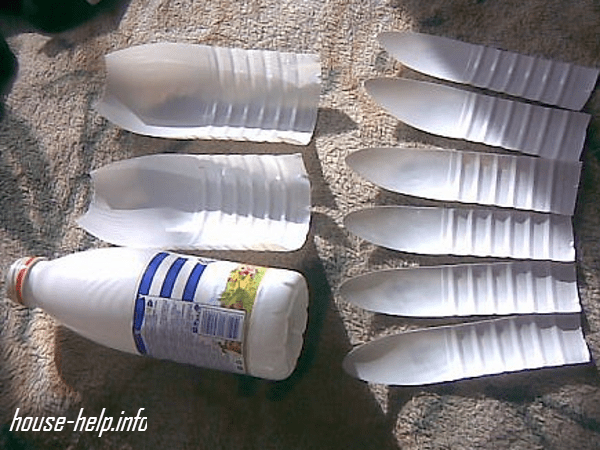
The most laborious and longest stage preparatory work- blanks of feathers. They will be required a large number of, of different lengths, shapes and colors: for the design of the wings and tail - long, dark and white, for the body - light smaller ones.
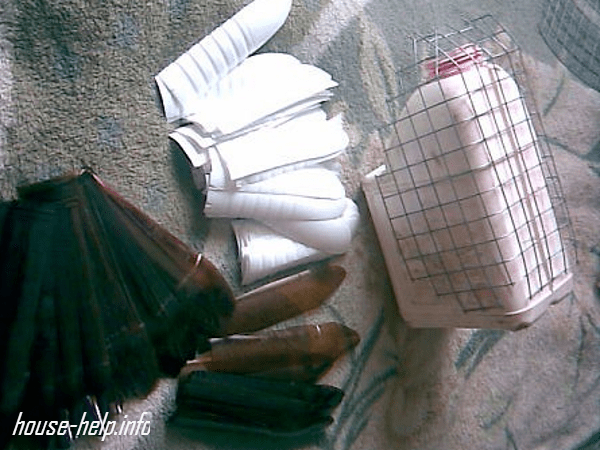
For crafts use light and dark feathers
The neck and bottom of the bottle are cut off, the remaining middle part is cut along and strips are cut out of the resulting rectangle. One edge of the strip is rounded. From liter bottle make 6 large feathers.
1 liter white bottle is divided into 6 parts
For plumage of the neck, small feathers are cut out and the ends are made in the form of teeth or fringes. You can decorate a long neck with large plates from halves of milk bottles, which are finely chopped around the edges.
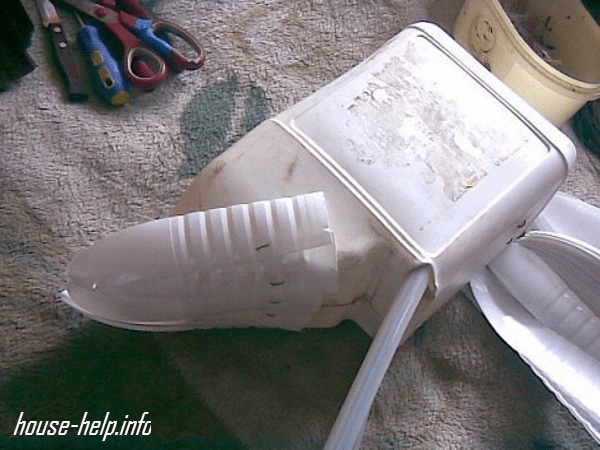
The body is made from a canister with a cut off handle.
A canister with a cut off handle is the body of our bird
Fine mesh is used as the base of the wings. metal mesh, which is fixed to the canister with wire or staples. The mesh along the edges is cut in the shape of a wing and bent down.
A fine-meshed mesh is fixed on the canister - the basis of the wings
A wire is inserted into the neck of the canister and bent, forming the frame of a long neck. Fasten the wire to the metal bar of the legs and put on it a corrugated tube or hose from the vacuum cleaner.
Strengthen the wire for the neck and put a hose on it
A hole is made in the lower part of the container and a bent rod is threaded into it - these will be the legs.
The legs are made of wire by bending it and threading it through the hole at the bottom of the canister
Or they pierce the canister from below and insert curved rods, on the ends of which they put the paws upside down.
After preparing all the details, the structure is assembled.
Begin to screw feathers from the lower part of the body
The wings begin to be decorated with feathers from the edge, using dark-colored blanks
The third and subsequent rows on the wing are made of white feathers.
It is not difficult to make a stork with sweeping wings
In this case, the feathers are screwed onto the entire canister, and the mesh base of the wing is covered with plumage on both sides.
On spread wings, feathers are attached on both sides.
By decorating plastic craft can be made brighter, especially if only transparent bottles were used in its manufacture. For this, acrylic dyes for outdoor use are suitable. Previously, the plastic container is wiped with an alcohol-based solution and painted over with white or black paint until the feathers are cut out.
Acrylic facade paint is moisture resistant and does not fade under the sun
The beak and paws are painted red or wrapped with red tape.
The beak and legs are painted red
Eyes are made from beads, decorative blanks for toys or small buttons that are put on glue. You can just paint them with black paint.
Acrylic paints become brighter after varnishing.
There are many options for making a stork from plastic containers using elements made of wood, polyurethane foam, and polystyrene.
Such an original composition of the stork family in the nest is also made of plastic
Even a beginner will be able to make such a garden sculpture, guided by video footage from step by step instructions workflow.
Storks from plastic bottles - original decorative ornament personal plot and an object of universal admiration. After all, they are made from ordinary garbage, turned into skillful hands into works of art. Made of durable plastic, they are not afraid of rain and snow. Over the years, the figures will not swell, the paint will not fade or peel off.
A well-groomed and attractive garden will always please the eye. To make your garden more comfortable, you can decorate it with various hand-made ones. Today we'll talk about how to make a stork for the garden and what materials can be used for this.
Let's start with the simplest - PET bottles.
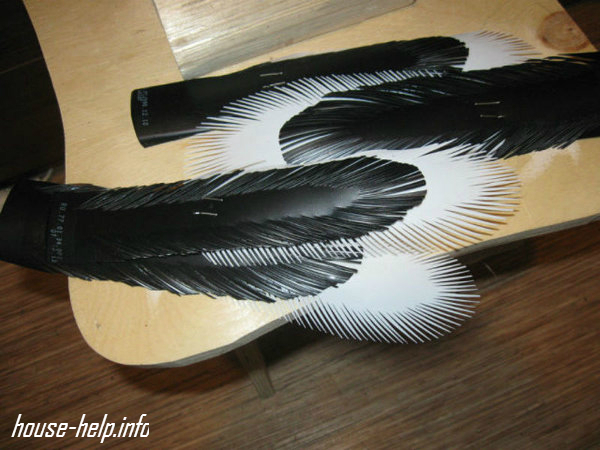
Before you get started, you need to take a small sheet of plywood and make templates out of it. The templates must be made in the form of the body and wings of a bird, as shown in the image. You will also need opaque plastic bottles (preferably white or black), red tape and self-tapping screws. The procedure is as follows.

Step 1. First you need to connect the previously made templates with self-tapping screws. Plastic milk bottles will be used as feathers. The bottles should be cut into strips of the same width, and then make a fringe on the edges of each of them.
Step 2 Next, the finished feathers must be fixed on the "body" of the stork with a glue gun. It is characteristic that PET bottles of already black color will be used for the lower part of the body and tail (usually shampoo containers are used for this).
Step 3 The beak should be wrapped with red tape.
Step 4 For the manufacture of legs, ordinary wire is used. Eyes for a bird are bought at any needlework store. That's it, the stork is ready with your own hands!


Now let's talk about another option for making a stork for the garden with your own hands. Now you need to pre-prepare a 5 liter plastic container, mounting foam, polystyrene and adhesive tape. The algorithm of actions should be as follows.

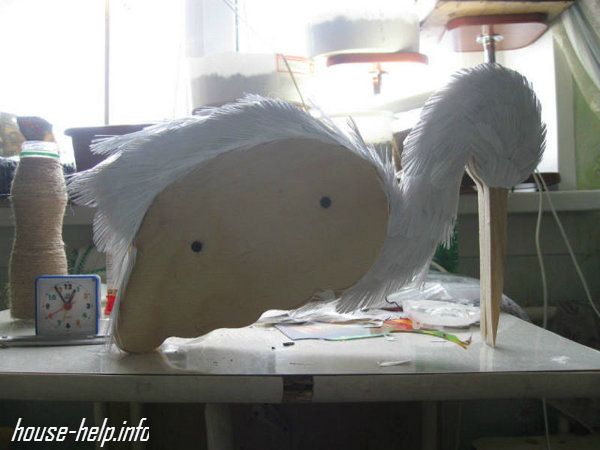
Step 1. First, body parts are attached to the bottle using a container. For the neck, an ordinary wire is used, overlaid with pieces of foam. The hips must be made in a similar way (using foam and wire). An ordinary large-diameter nail is quite suitable as a key.
Step 2 The blank will look at the preliminary stage as shown in the image below.
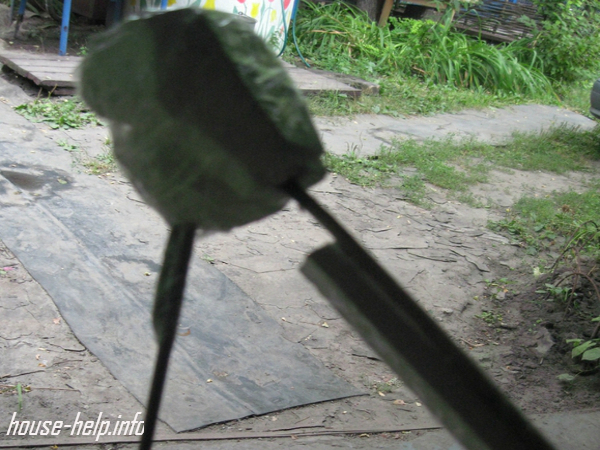
Step 3 For the legs of the bird (at least in this implementation), used electrodes are used. In the absence of electrodes, you can select a similar material - for example, a thick wire twisted into several turns, or metal rods from thin reinforcement.
Step 4 So, all parts of the "body" of the stork are assembled, but before proceeding to the next step, it is necessary to carefully check the strength and reliability of the fasteners.
Step 5 After that, the entire layout must be covered with mounting foam.
Step 6 All excess is neatly trimmed.
Step 7 Now the sculpture is almost ready. If the mounting foam is already completely dry, then the bird needs to be painted with acrylic paint.
Step 9 Natural feathers are inserted into the wings and tail to make the stork look as realistic as possible. See what a wonderful garden stork you will get (if you do everything right, of course).


Before you get started, make sure you have the following Supplies:
five liter cans
plastic bottles (black and white color);
· plastic tubes;
· thick wire;
foam plastic;
After that, you need to perform the following sequence of actions.
Step 1. Cut out blanks from foam, use a knife to outline the head. Cut out the eye sockets, make the beak flatter.
Step 2 Use sandpaper to make the surface as smooth as possible. Place toy eyes in the eye sockets (we have already talked about where you can get them).
Step 3 Cut a beak out of a plastic bottle and secure it with glue.
Step 4 From a plastic canister, make the body of a bird, cut off the handle.
Step 5 Cut out a piece of mesh large enough to wrap around the canister. Round the mesh a little so that it looks more like wings.
Step 6 A thick metal rod must be bent and legs made from it.
Step 7 Stork feathers are cut from white bottles.
Step 8 After that, you can proceed directly to the assembly of all elements. Work should start from the "tail".
Step 9 For the “neck”, a corrugation is put on the wire (for example, from a vacuum cleaner) or something similar. Feathers are attached with self-tapping screws. Due to the fact that the wings of our bird are folded, feathers can only be fixed on the stomach and a little on the sides.
Step 10 White bottles are cut in half, fringe is formed at the cuts. Bottles are attached to the "neck" with adhesive tape.
Step 11"Wings" must be done from one edge of the prepared mesh. It is important that the second row covers the first by 1/3. On the third row, white plastic is already used.
Step 12 For the "legs" of the stork, the corresponding blanks are cut from 0.5-liter bottles.


Step 13 It remains only to paint the "beak" and "paws" of the bird in red. That's it, the garden stork is ready with your own hands!

For a more detailed acquaintance with this manufacturing method, we recommend watching the thematic video.
A well-groomed and ennobled cottage contributes to the creation of an atmosphere of peace and tranquility. A do-it-yourself stork for the garden is a great addition to flower beds, flower beds and lawns. This bird is a symbol of happiness, prosperity and prosperity. Garden sculpture of a stork looks good anywhere. You can install it on the ground, roof, pole or tree. To give the product realism, a technique such as building an artificial nest is used.
Figurines of storks for giving bring happiness and benefits, they are also good decoration lawns and flower beds.
To work, you need several plastic bottles in black and white. The basis of the structure will be a sheet of waterproof plywood.
To work, you will need the following tools and devices:

The stork can be made from plywood and plastic white milk bottles that are cut into fringes for plumage.
After the tools and materials are prepared, work can begin.
It is carried out in the following sequence:
The stork figure is ready. It can be easily attached to any surface. With the onset of inclement weather, it is better to remove the product and store it in a warm room until spring.
Back to index
As a rule, after carrying out external wall insulation, quite a lot of foam plastic scraps remain. They do not need to be disposed of. From this material you can make a lot of interesting and beautiful crafts. Polyfoam is light and easy to handle. You can make a stork out of foam plastic quickly, without the use of complex tools.
To work, you will need the following materials and tools:

Making a sculpture of a stork for the garden is carried out in the following sequence:
The final stage of needlework are the eyes. They are made from steel bearings or glass balls.
Back to index

An unused foam can can be successfully used to make a three-dimensional stork figure. With the help of foam, you can quickly make a three-dimensional blank, from which you can cut out the desired shape.
For work you will need:
There is a similar set in the closet of every house. Additional costs will not be required.
A garden decoration is made in the form of a sculpture of a stork in the following sequence:
To give the sculpture realism, you can use natural black and white feathers that are inserted into the tips of the wings and tail.
For reliability, they need to be planted on polyurethane glue.
The finished figure can be installed in the garden for a long time. The stork, decorated with acrylic paints, perfectly tolerates exposure to ultraviolet, cold and moisture.
Polyurethane foam is a convenient material for creativity, since it is plastic, hardens quickly, and is easy to process. It is used to create original sculptures for decoration. garden plot. A do-it-yourself stork made of polyurethane foam looks spectacular.
Would need:
Stages of work:


