When there are so many things that there is nowhere to put them, the task of creating additional storage space arises, and the rack is perfect for this.
Shelving is suitable for any interior and can fit anywhere in the house. The design itself implies a significant degree of freedom in the choice of material and forms - it can be made for any interior, from the corridor to the living room.
Racks made of natural eco-friendly material can be used in the nursery, in the kitchen. With the help of a rack, you can quickly put things in order in any cluttered room.
The rack can also be used in the kitchen to free the kitchen table from unnecessary items.
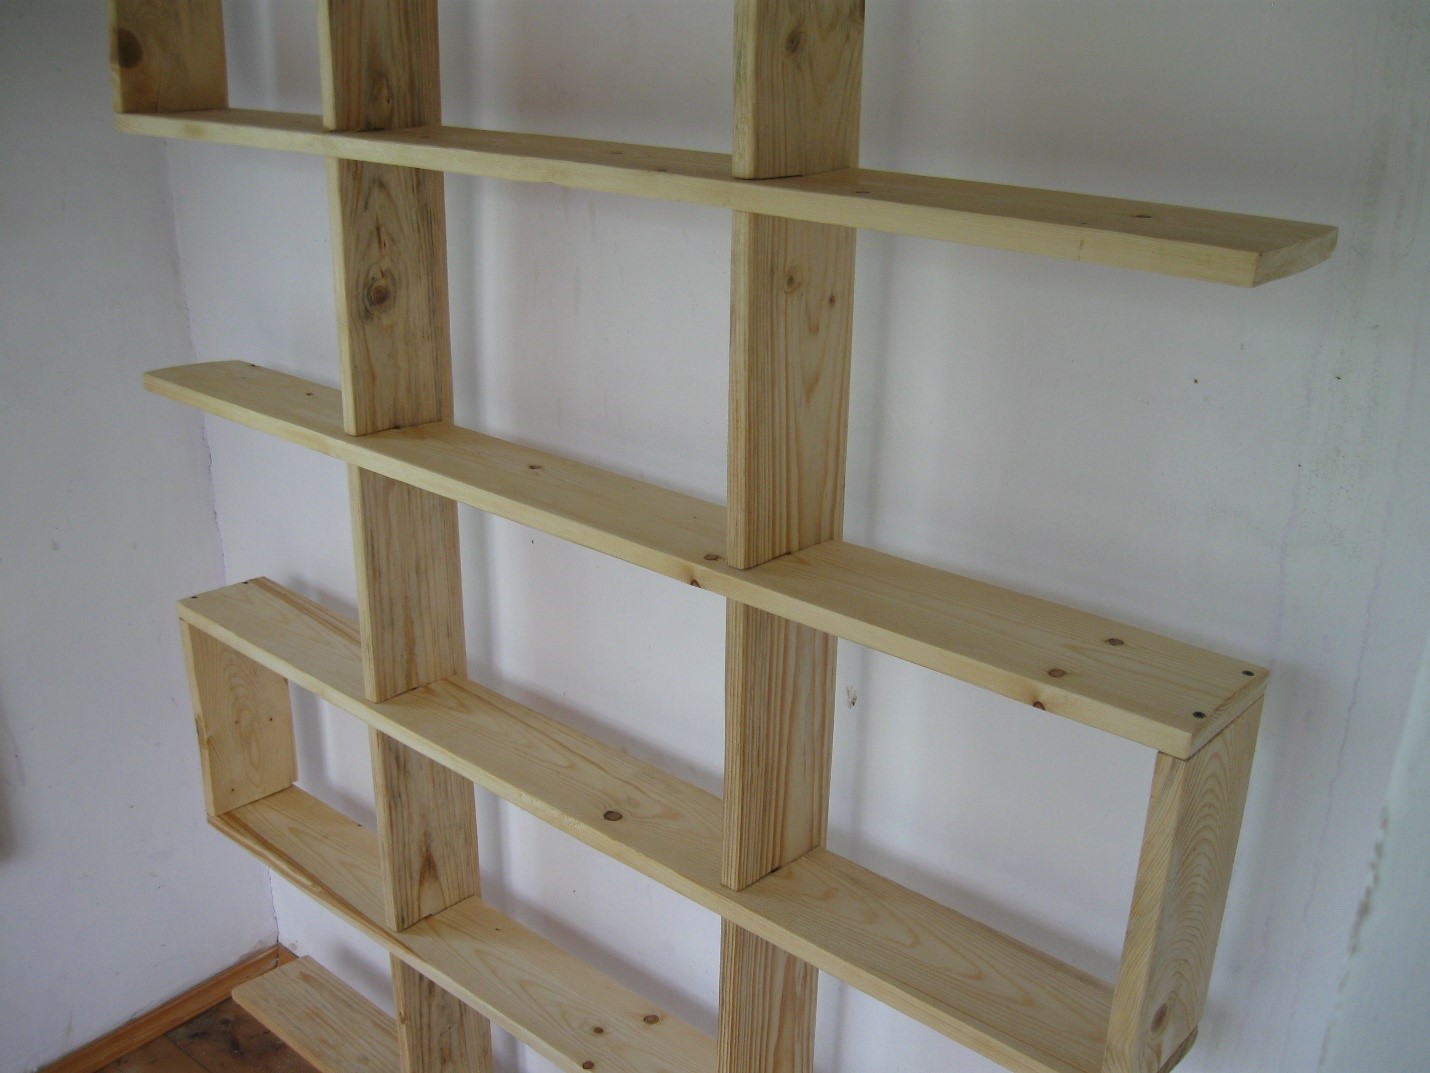
The design of the rack is extremely simple - it is a frame on which shelves are fixed at different heights. For added stability, it is attached to the wall.
For the rational use of space, hanging racks are suitable - the upper part of the wall is often left unoccupied, it can be used to place things.
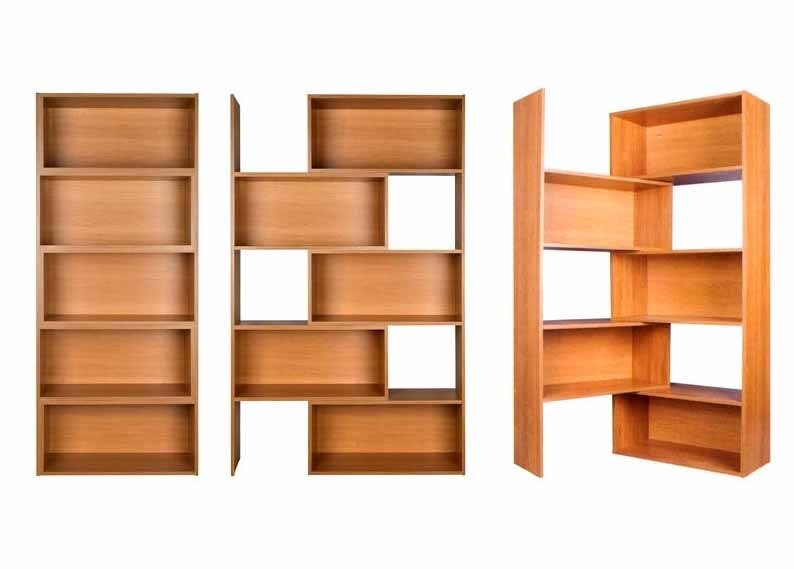
Despite the huge volume they hold, they do not clutter up the space, maintaining a sense of air and spaciousness, especially for racks without back walls. For storage of stocks, you can choose just this type of shelving. They can be arranged so that the approach is from any side. They are also suitable for a garage or pantry.
Graceful creations made of wood and chipboard with partitions, drawers and lower closed shelves will be an excellent addition to the interior of a living room, bedroom, or your own office.
The rack can be used for zoning the room, while it will help maintain order. The absence of a back wall will make the division of zones weightless.
The rack can be placed on furniture wheels, and if desired, moved, changing the space, or used as a static partition.
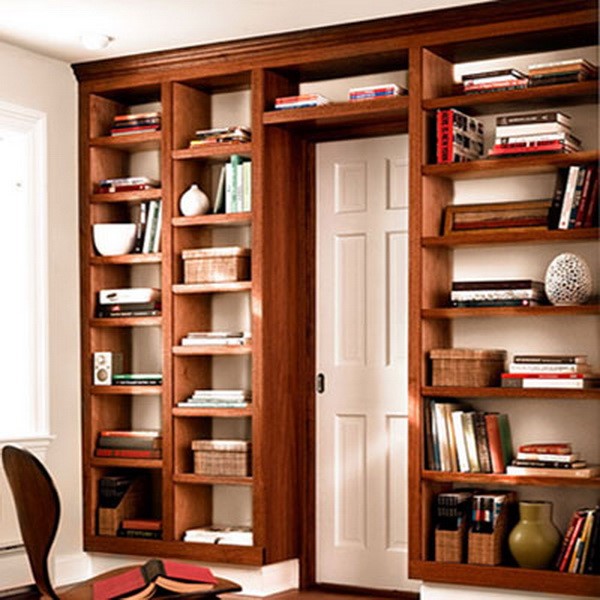
 Most often, racks are used to store books, and such a rack can stand anywhere, even occupy non-functional space in the corridor.
Despite the numerous advantages of solid bookcases, bookcases are very popular, and their low cost only reinforces their advantage.
 Small shelving fits perfectly into the hallway, regardless of its size. Umbrellas, shoes, gloves and keys get their permanent places, and are in sight and at hand.
 The rack installed in the kitchen saves space significantly, because you can place hanging, hanging products by placing utensils on them according to the frequency of use.
In the living room, a beautifully executed rack can replace a bulky wall; everything will fit on it, from a TV to books and trifles.
If you make several shelves with doors, then it will be possible to arrange bottles of wine, glasses, dishes for receiving guests.
 To begin with, the idea of \u200b\u200bthe rack must be depicted in the drawing. To do this, the space that is allocated for it must be measured and plotted on graph paper on a scale. Then the shelves are drawn, with reference to the actual size and taking into account what will be stored on the rack.
If heavy things will be placed on it, such as spare parts or tools, you should not make the shelves too long so that they do not sag over time. Their length should not exceed 1 meter, while they can be additionally reinforced with a metal profile.
If the rack is installed from wall to wall, then you need to decide which design to choose:
Even if there are things with low weight on the shelves, they should not be made longer than 1.5 m, otherwise they will begin to sag.
The shelves themselves should not be too deep so that all things can be easily reached. In general, the presence of several rows on the shelves very quickly becomes tiring, especially when you have to put everything out to find what you need. Therefore, the depth of the shelves should not exceed half a meter.
The height of the shelves is also worth considering separately. It can range from 30-40 cm to 50-60 cm. This value depends on the dimensions of things, you must immediately plan what and where it will stand. Shelf height should be at least 7-10 cm above the tallest item that will be placed on the shelf, then it will be convenient to get it. 
The simplest shelving is suitable for a garage or pantry, if the product will stand in rooms, you should consider a more elegant design solution - finishing, configuration, and the presence of decorative details.
All calculations should be schematically reflected on a scale grid in compliance with proportions. Then simply measure the dimensions of the components, make an approximate layout of the material and get to work.
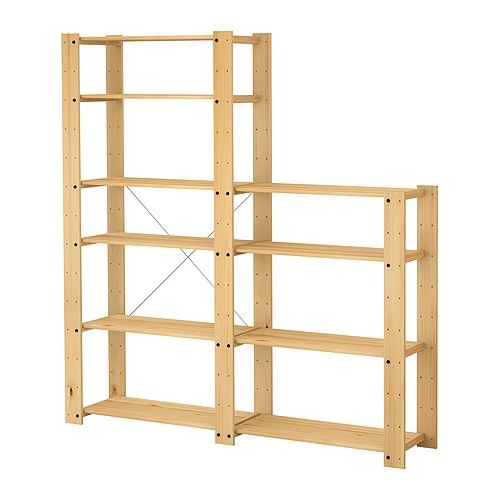
Below is an assembly diagram of the simplest shelving, the main parts of which are support frames and shelves.
The most affordable material is wood, it is inexpensive and easy to buy. In addition, its processing requires minimal skills - if the rack is the first product, then making it from wood guarantees success even if there are errors.
For a simple model, you need to choose a 5X5 planed timber and boards for shelves. Shelves can also be made from sheet material: chipboard, plywood.
Metal works well too, but working with metal requires some skills, for example, you will have to master drilling a hole in metal. Metal products have increased strength, durability, and are well suited for high-tech interiors. It is possible to combine a reinforced frame with wooden shelves, which will be carefully processed - this product can be done elegantly.
To do the job, you will need the following tools:
You also need to buy brackets for fixing shelves or metal corners.
To process wood, you need to buy special liquids, for example, with fire and bioprotective properties, stains of the desired shade, varnishes. Varnishes can be purchased immediately with the desired shade, there are also colored ones: green, blue, etc.
First, in accordance with the drawing, mark the main parts of the product on the material, carefully measure everything down to the millimeter.
After they are cut, they should be processed:
Grind with a grinder, changing the nozzles from coarse and medium grain to fine. When buying material, it is better to choose planed boards, then finishing work will take less time. When sanding, you should pay attention to the sides and especially to the cuts - you need to make them smooth.
Soak the prepared parts with an antiseptic or stain, dry well.
The steps for assembling the rack look something like this:
Then the parts are combined on the floor and fastened with self-tapping screws.
The easiest way to get a new piece of furniture is to buy a prefabricated kit.
The advantages of this solution to the problem are obvious:
All parts are already professionally processed, metal parts are made of stainless steel, galvanized or coated with anti-corrosion agents, wooden parts are also fully prepared for assembly.
In most models, the variability of the heights of the shelves is provided - they can be rearranged without any additional steps. 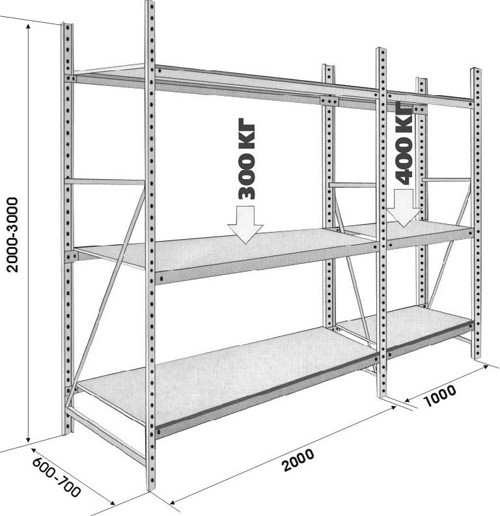
Do-it-yourself shelving will not only save a substantial amount, but also transform the space of the house. One has only to try once to put your own piece of furniture and load it with things, there will be a desire to do something else.
Even if the hands are not very skillful, they will be able to make a rack after watching this video. When viewing, you should pay special attention to the processing of parts and how they are connected.


